The other day at work I noticed we had some really beautiful red bell peppers that were perfect for roasting. Right away I knew I wanted to make a batch of my Muhammara so the staff could try it and maybe we could figure out a way to utilize it in a special of some sort. It was popular with everyone who tried it, but nobody, including me, had any immediate ideas of how exactly we'd be using it. There was still a little left after a couple days though, and I wanted to get it all used up so it wouldn't get tossed, so I thought I'd make some sort of pita sandwich with it. I didn't really have anything specific in mind, but I figured chicken would be good in it. Ok, but chicken and what else? And how to prepare it? Paprika popped into my head, so I started thinking of ways to cook it with that. Got a basic outline of what I wanted, then I did a search for "Paprika Chicken" and came across a bunch of recipes for what's commonly known as Chicken Paprikash. I kind of blended the two together and ended up with my Chicken Paprikash Samwich. And even though I could barely taste it due to some sinus and lack of sense of smell issues I've been having lately, I'm really proud of it. It looks good, and it went over really, really well with my taste-testers. We'll definitely be doing it as a special soon.
Don't be put off by the number of ingredients or the length of the recipe- the Muhammara probably takes the longest to make, due to the roasting and peeling of the peppers (you could always just buy jarred roasted red peppers, but... Why would you do that?), but once that's done it all goes together pretty quickly.
What you'll need-
For the sandwich proper-
Muhammara (can be made up to a few days in advance)
Pita bread or naan (I have a good recipe here)
Baby spinach
Kalamata olives*
Goat cheese*
Toasted walnuts
Pomegranate molasses**
For the Paprikash-
1/2-3/4 c olive oil
1/4 c smoked paprika
1/4 c regular paprika (Hungarian is preferred for this, but I used Spanish and it turned out great too)
2 t cumin
1/2 t kosher salt
1/2 t black pepper
1/2 t lemon juice
Dash of cayenne
***
Chicken (breast or thigh, cut into strips or cubes)
1-2 c water
1/2 c sour cream
1 T flour
Diced tomatoes
Julienned onions
Montreal Chicken Seasoning
Kosher salt/pepper
Splash of red wine vinegar or lemon juice
Ok, let me break down my process a little for you. I had initially planned on cooking the chicken in some sort of olive oil/paprika mixture, so I came up with the first half of the Paprikash recipe above. I think I used a total of 1 c olive oil, which proved to be too much, though it didn't affect the overall quality outcome of the sandwich. For this recipe I'd start with 1/2 c and add up to 1/4 c more if you feel like it needs it, though I don't think it will. This is the part where I looked up Chicken Paprika recipes and came across the Chicken Paprikash recipe. I used the one here at No Recipes as a guide.
Their recipe called for chicken stock. I didn't happen to have any on hand at the moment, so I improvised as best I could- Montreal Chicken Seasoning (I think it was McCormick brand, though I'm not sure it matters all that much), salt, pepper, water. Maybe a little Italian seasoning, I can't remember. Chicken stock may well have been better; chicken stock with added Montreal chicken seasoning may well have been better yet, I don't know. I do know, based on what my taste testers told me, that this particular iteration worked really well. As for how much Montreal seasoning/salt/pepper to use, I can't really say at this point- due to the aforementioned sinus issues, I couldn't taste it anyway, so I just eyeballed it. I'd start with a small amount and add more according to your tastes.
Mix up the first half of the Paprikash recipe and add to a medium saucepan. Add in the water/Montreal Chicken Seasoning/salt/pepper/ and bring to a simmer. Mix the sour cream and flour thoroughly and slowly temper it into the mix. Hard sear the chicken in a sauté pan with a mix of olive oil and butter. When you reach your desired level of color/carmelization, add it to the Paprikash mix to finish cooking. Deglaze the pan with a splash of red wine vinegar.
(Note: based on a lot of personal experience, my preferred way to sear chicken in a pan is as follows- heat the pan on high, dry- no oil/spray - until the pan is smoking, or pretty darn close to it. Add the chicken, let it set for a few seconds, then stir a couple times, then add your oil/butter. You don't want to add the fat at the beginning because it will burn before the pan gets hot enough, and also there's the risk of splashing hot oil when you add the chicken. Trust me, the extreme heat of the pan will prevent the chicken from sticking, then you can finish it off with the oil/butter with no worries of burnt/splashing oil. But it has to be hot, Hot, HOT for it to work. If the chicken sticks to the pan to the point where the it tears- the pan wasn't hot enough. You'll want to turn on your overhead fan for sure. If in doubt, nervous, or if you don't have a good vent system, you'll want to just do it normally over medium heat or whatever. This is just my personal preferred way to do it, having learned it back in my early days in the restaurant biz. It works great and is faster than just heating the pan to medium/med-high and then adding the chicken.)
After deglazing the pan, sauté a handful of julienned onions and add those to the pot. Deglaze again with a handful of diced tomatoes, preferably ones heavy with juice. Add those to the pot and simmer until the chicken is fully cooked.
Now for the tasty part. Spread a generous layer of Muhammara on your warmed flatbread and sprinkle on some baby spinach. Using tongs or a slotted spoon, spread as much of the chicken/tomato/onion mix as you can fit over that. Add kalamatas, toasted walnuts, goat cheese. Finish with a drizzle of pomegranate molasses.

 |
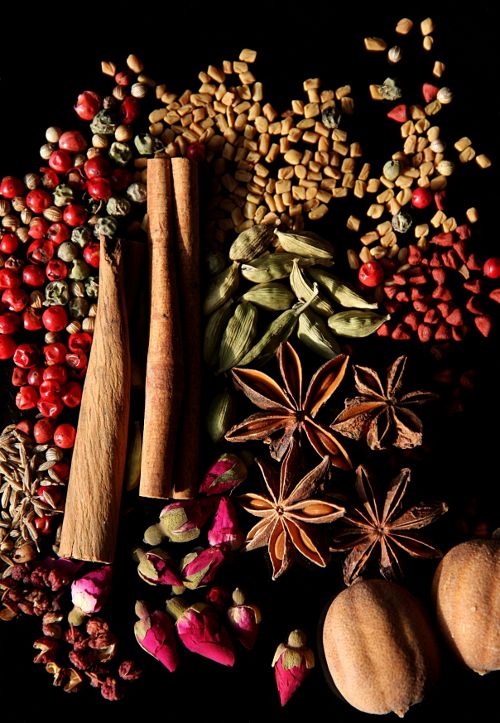
| maybe garnish with rose buds, if you got 'em |
*In place of kalamatas and goat cheese, regular black olives and feta work very well too. I use goat cheese with kalamatas because they offset each other; I think kalamatas and feta together would be too salty, but feel free to try it out.
**Pomegranate molasses- basically just super concentrated pomegranate juice. You can find it at a lot of grocery stores nowadays, most Asian stores, and definitely any Middle Eastern store, as well as online, but if for some reason you can't get any, you can always just buy some 100% pomegranate juice and simmer it down until it's nice and thick (which is exactly what I did in this case).
*Update* - I actually now recommend buying 100% pomegranate juice and simmering it until it's concentrated, instead of buying the commercial kind. (Unless you can find a commercial brand that's just 100% pomegranate juice.) I recently shopped around for some and found a couple popular brands that had added sugar and citric acid. I don't have a problem with either of those two, but it definitely didn't taste as good as the stuff I made from 100% juice. So yeah, the homemade stuff is a little more expensive, but if you want the highest quality pomegranate molasses, it's definitely the better choice.